I built a custom box to run TrueNAS a while ago but took it offline because I wasn’t really using it. Now, I’ve got a reason to bring it back online: hosting services for my yard and irrigation project. The original setup was rushed, so I wanted a plan to safely bring it back online on the new network backbone.
This article mentions some IP mismatch issues, I cover that in my Network Backbone post.
Hardware Overview
I originally picked TrueNAS because it can host virtual machines and containers. My intention was a hybrid file server / VM / container host. Here’s the parts list:
- MSI B550M Mortar MAX motherboard
- Ryzen 7 5700G CPU (8 cores, 16 threads, 4.6 GHz)
- Corsair Vengeance 2 x 32GB RAM
- Samsung 990 Pro 1TB SSD (boot drive)
- 4 x 12TB Seagate IronWolf Pro NAS HDDs (storage)
- Corsair RM750x PSU
I’m running a RAIDZ2 configuration on the HDDs. This gives me 24TB of usable storage and allows failure of two disks without losing any data.
(Yes, I know I need to configure backups! That’ll be another post down the road.)
Bringing the NAS Online
Because the NAS had been offline and not received any updates, I wanted to bring it back up while it was still offline. This let me validate configuration before it had any exposure to WAN.
I started by making a custom Ethernet cable and connecting it to a port on the switch. I assigned the port to the Services VLAN and ensured the NAS had a DHCP reservation. With the NAS being the first device on the Services VLAN, I just cut WAN access to that VLAN with the VLAN configuration on the UDM.
IP Migration Hurdles
I had a static IP conflict between the old and new VLANs, plus a local interface conflict on my laptop to handle.
I vaguely remembered setting a static IP in TrueNAS originally. This meant the old and new VLAN ranges didn’t match, so I had to move everything to the migration VLAN with the old IP range. My first attempt to test with my laptop using the old range didn’t work due to a conflict with the laptop’s Ethernet and Wi-Fi interfaces trying to use the same IP. After assigning a random IP to the Wi-Fi adapter, I could then use that IP on Ethernet and finally access the NAS GUI.
Once I had access, I:
- Stopped all containers and VMs to avoid issues
- Removed the old “Allowed IPs” restrictions temporarily
- Changed the NAS interface IP to the new VLAN
- Updated DHCP reservation and port assignment in UniFi
Finally, I had the NAS up on the new network, my shares reconnected immediately, and I could see the data I had saved.
Hardware Troubles: The Dropped Drive
When I originally built the NAS, I dropped one of the original 4TB HDDs from a height of a few inches onto a wood table. The original pool was 4 x 4TB Seagate IronWolf Pro NAS HDDs. Even though the NAS still worked, the drive head sounded off and I didn’t want to risk my pool having issues. After a year powered down, that disk’s startup noise was worse than the others, so I decided to get a new drive.
Simply buying a new 4TB drive was proving challenging. Due to current hardware pricing and availability issues I wasn’t able to find an unused 4TB IronWolf. I had two 12TB IronWolfs set aside for what was going to be a backup NAS, so I checked to see if I could find two more twelves. I was able to find a seller who had three in inventory and I bought two to pair with the two twelves I already had. At the end of the day, I wound up increasing my storage capacity from 8TB to 24TB after RAIDZ2 does its thing.
I needed to figure out which of the currently installed drives was the one I dropped, so I powered the NAS down and brought it up running one disk at a time by opening the case and unplugging power to three drives per boot, listening carefully. I found that one disk had a slightly different sound when spinning up which confirmed my suspicion. That disk was boxed up and labeled as bad, for use in emergencies only.
The three remaining good 4TB drives were repurposed. One goes into the UDM Pro to extend log retention, and the other two are reserved for a future Security Onion / SIEM project
New Storage: 12TB Drives
Once I received the two new 12TB drives and had my full set of four, I popped them in the NAS. After installing them extremely carefully (HDDs really don’t like being dropped) the boot was quiet and clean and all four drives detected at 10.91 TiB each.
Creating the Pool
In TrueNAS SCALE 25.04, I:
- Clicked Storage → Create Pool
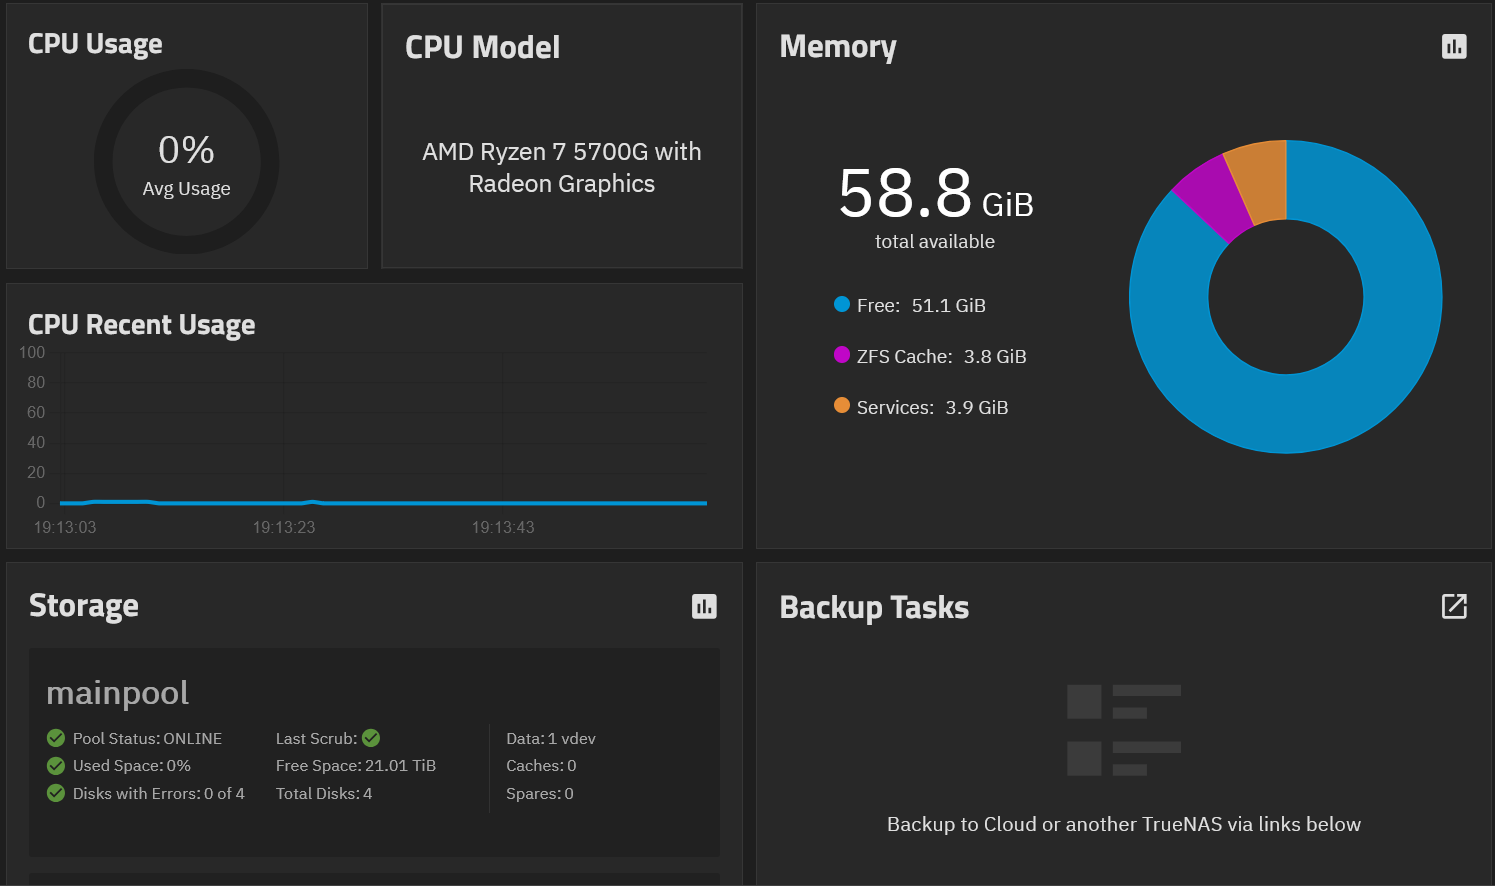
- Named it mainpool
- Enabled AES-256 encryption for security
- Selected RAIDZ2 (4 disks, 1 vdev) for redundancy
I skipped all optional extras:
- ZFS LOG / SLOG – no need for synchronous write acceleration
- Spare – none available yet
- Cache (L2ARC) – dataset won’t exceed RAM; no extra SSD
- Special Metadata vdev – unnecessary for my small files / database
- Dedupe – RAM-heavy and not beneficial for my workload
I downloaded and securely stored the encryption key in multiple locations. The pool creation was suspiciously quick, but everything checked out as being okay; TrueNAS just sets up metadata structures—the actual blocks aren’t written until used.
Where I’m At Now
The NAS is online, the drives are healthy, and the pool is created and encrypted. Next steps will be:
- Configure users, groups, permissions, and datasets
- Set up the TimescaleDB container to hold my weather data
- Set up my Pi cluster to handle data ingest and running other automations